I’ve documented all my steps so far to get to this point:
- Tronxy x5SA-600 Klipper Conversion Part 1 – The Exciting Bit – Buying Parts
- Tronxy X5SA-600 Klipper Conversion Part 2 – The Scary Bit – Rewiring
- Tronxy X5SA-600 Klipper Conversion Part 3 – The Anxious Bit – Octopus Pro Hookup
- Tronxy X5SA-600 Klipper Conversion Part 4 – The Moment Of Truth Bit – Turning It On And Installing Firmware
And I had my printer back online, but it was time to start on some calibration to make sure it works as it should. This is split into 2 parts. The first is what I’ll refer to as bulk calibration – making sure that 100mm along the X-Axis is 100mm and not 200mm.
The second part is the micro-calibrations – compensating for the bed frame skew (it’s off by about 1 degree) and performing PID calibrations on the hot-end and heat-bed.
Bulk Calibrations
I had the printer moving in all the right directions, but there was something clearly not right. Clicking on the 100mm X-Axis movement 3 times, would see the print head move the entire 600mm width of the gantry.
In my printer.cfg file, I took the rotation_distance number from the printer.cfg file of the X5SAPro that was included with Klipper. This printer looks to use a lot of the same hardware as the 600 so I figured this would be a good starting point. The supplied value was 40, but I found increasing this to 60 brought it back down to 100mm and it would take 6 x 100mm movements to move the length of the gantry. Win!
I figure the Y-axis would have the same issue, so I updated that the same and it fixed the Y-Axis for me. The Z-Axis similarly had to be increased from 8 to 12.
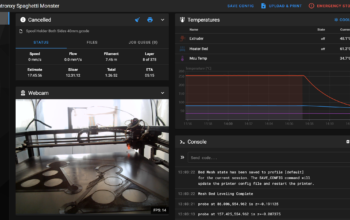
PID Calibration
Klipper comes with a neat little Console command called PID_Calibration. Running this command will automatically calculate the PID values for the heat-bed or hot-end and update the printer.cfg file accordingly.
The command is as follows:
PID_CALIBRATE HEATER=<config_name> TARGET=<temperature> [WRITE_FILE=1]:

Perform a PID calibration test. The specified heater will be enabled until the specified target temperature is reached, and then the heater will be turned off and on for several cycles. If the WRITE_FILE parameter is enabled, then the file /tmp/heattest.txt will be created with a log of all temperature samples taken during the test.
To run this for my hot-end, I entered the command:
PID_CALIBRATE HEATER=extruder TARGET=195This will heat the bed up to 195 degrees then let it cool off a bit before setting it to 195 again. It repeats this cycled around 6-8 times (I don’t remember exactly). Likewise, the following was used for the heat_bed
PID_CALIBRATE HEATER=bed_heater TARGET=55The bed heater calibration takes a good 15-20 minutes to complete as the 600mm bed does take a few minutes for each cycle.
Once the calibration is completed, the following command can be used to write the PID values to the printer.cfg file:
SAVE_CONFIGZ-Offset
The Z-Offset gave me the greatest pain in my setup and I spent many hours trying to get it right just to find that it wasn’t behaving the way I wanted. I’d either have the hot-end crashing into the bed at print time or too far up in the air for the filament to stick to the bed. This is what finally worked for me, but I’m not sure if it was the right way to get there.
Firstly, make sure there is no heightmap loaded. If you’ve done a heightmap calibration prior to setting the Z-offset, the Z-offset will be off by the amount in the heightmap.
Next, I moved the print head to the middle of the bed, and ran the following command:
Z_ENDSTOP_CALIBRATEI then raised the print bed incrementally using the TESTZ command:
TESTZ Z=-3until the print bed just touched the nozzle. Setting Z=-3 moves the bed 3mm closer to the nozzle. I kept doing this using smaller and smaller intervals until I was satisfied that the nozzle was just touching the bed (down to 0.01mm increments).
Everything I have read online, has said to do the paper test for this. The paper test involves getting a piece of paper and putting that between the nozzle and bed and running the same TESTZ command. The test is complete when the paper can move freely under the nozzle but still drags along it. This always resulted in a Z-Offset that was too high for me. Maybe other countries use thinner paper than we have in Australia (80gsm).
After the test is completed run the following commands to update the printer.cfg file:
ACCEPT
SAVE_CONFIG
Probe Calibration
Calibrating the probe is almost identical to calibrating the Z-Offset. Just using a different command:
PROBE_CALIBRATEFollowed by
TESTZ Z=-3and
ACCEPT
SAVE_CONFIG
Bed Tilt
This is a really cool function of Klipper and I real time saver. By specifying screws_tilt_adjust in the printer.cfg file it enables a GCODE function called SCREWS_TILT_CALCULATE. What this does is probe the bed directly above the the bed screws and then tells you how much adjustment each screw needs to level the bed. It returns the adjustment amount using Hours:Minutes notation. So 1:15 is 1 hour and 15 mnutes or 1 and 1/4 rotations of the screw. It also tells you whether it needs to be clockwise or counter-clockwise. To run it enter:
SCREWS_TILT_CALCULATEWait for it to probe the bed and then make the adjustments. I found running it 2-3 times got it down to the point where there was very little adjustment to be made.
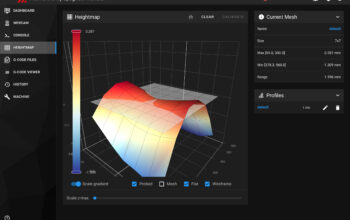
Heightmap
I have found that I get best results if I run a fresh heightmap prior to the start of each print. With that in mind, I don’t run the heightmap from the Klipper UI, and I definitely don’t want it saved to the printer.cfg file. The bed on the Tronxy has a huge 1.3mm variation. It rises in the middle like Olympus and drops off at the edges. I know this and there’s not much I can do about it. With this in mind, I have the following 2 GCODE lines in my slicer’s Start GCode setting:
BED_MESH_CLEAR
BED_MESH_CALIBRATE
Skew Calibration
One of the key reasons I wanted to get on to Klipper. I know my frame is out by 1 degree and there’s really no way to physically correct it. To be fair, Marlin also has this, but with the Tronxy firmware being locked down I was not able to access it. To do this, I printed off a Calibration part from Thingiverse and took some measurements.

The measurements above then went into the SET SKEW command as follows:
SET SKEW XY Length AC, Length BD, Length ADMy measurements were almost the same as those given in the Klipper documentation:
Length AC = 140.4
Length BD = 142.8
Length AD = 99.8
So my command was:
SET SKEW XY 140.4, 142.8, 99.8Then the usual SAVE_CONFIG to save it to printer.cfg
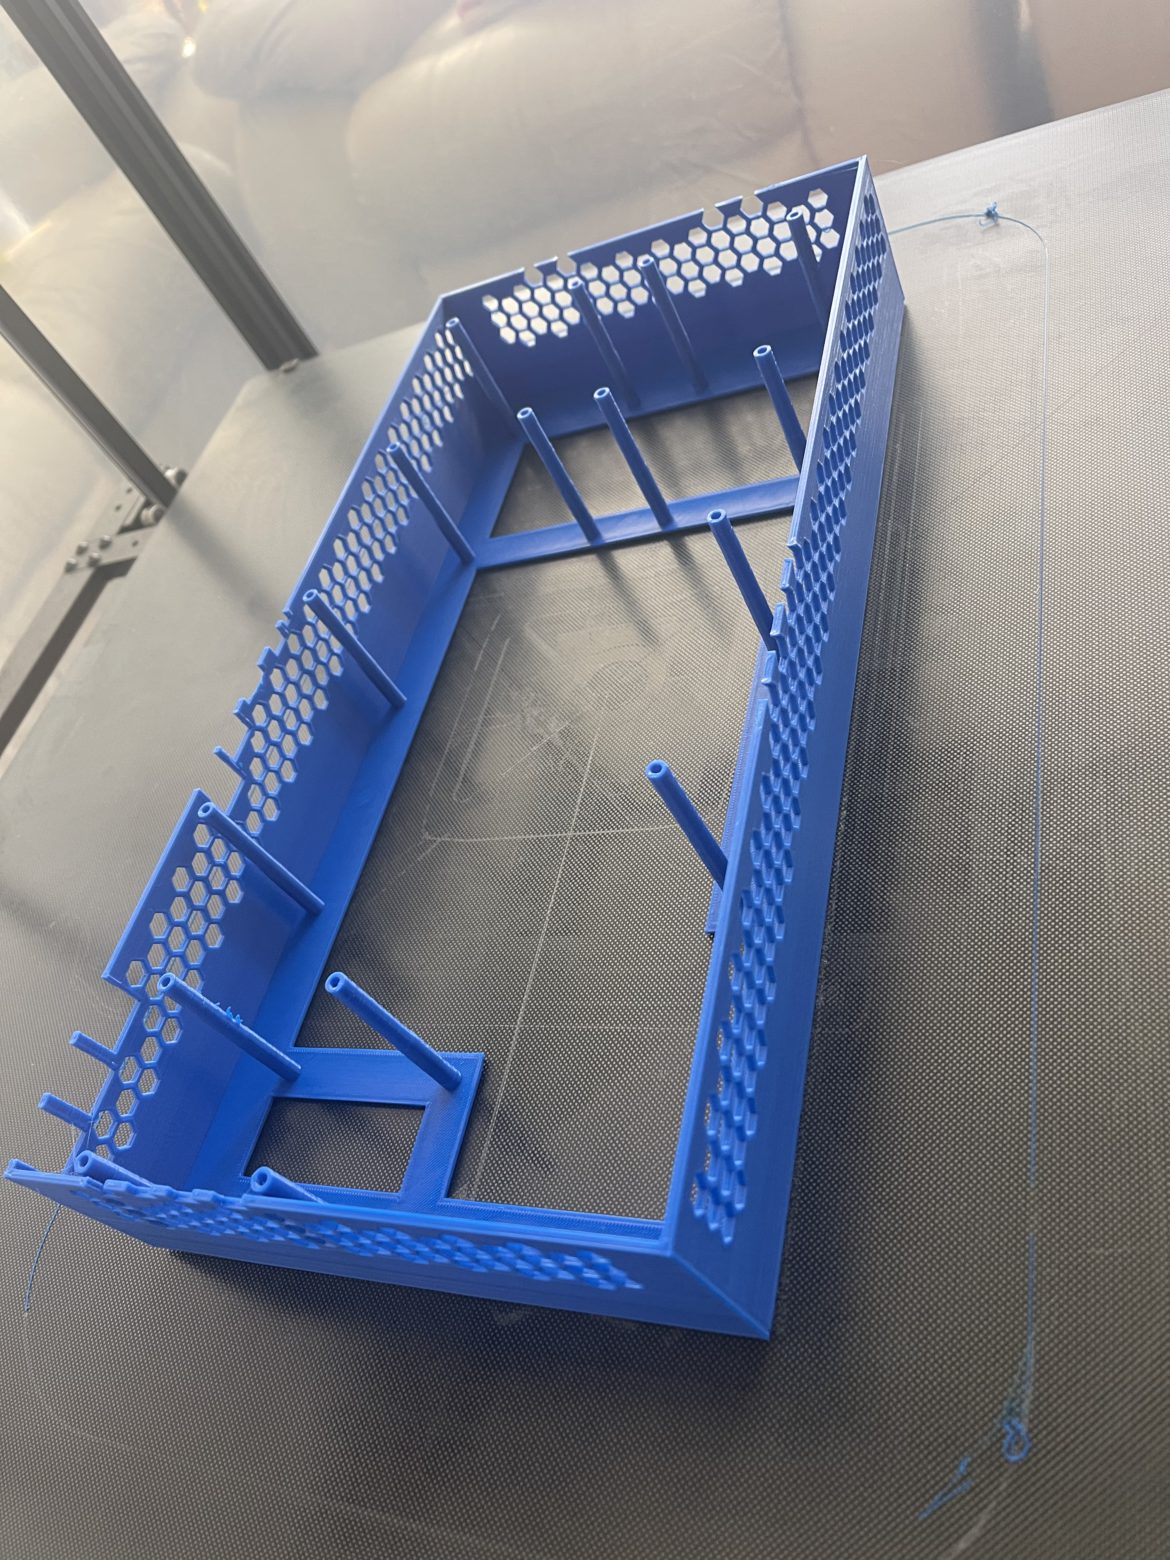
At this point I’m getting some prints that are of high quality. I’m really happy with what I’m able to produce and have started to print an enclosure that I designed for the electronics.