Way back in November 2021, I decided it would be really cool to have a 3D printer to make certain parts that a no longer available (NLA). I really had no previous interest in 3D printing and no knowledge on the subject.
I knew I wouldn’t be able to reproduce metal parts, but in some cases a plastic part is a reasonable substitute. Also, there’s plenty of plastic parts that I could design and make.
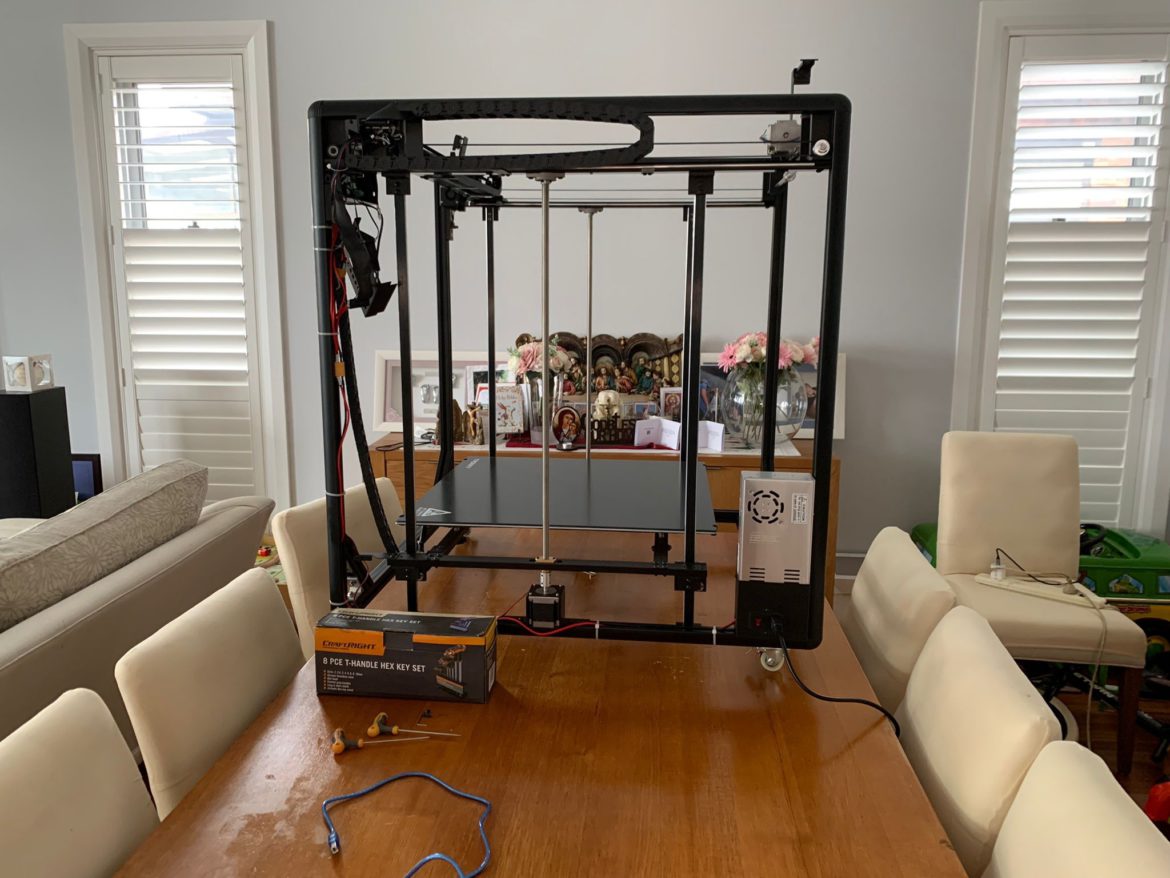
So with my usual naivety, I dived into the deep end and bought myself a large format 3D printer from an unknown Chinese company called Tronxy. The Tronxy X5SA-600. When I say large format, I’m not kidding. This thing has a printable area of 600x600x600mm. Many 3D printers out there have a max area of 150-250mm.
As well as the large print area, it ticked a lot of boxes for me, especially compared to the less than stellar reviews of some of the earlier Tronxy releases:
- Marlin firmware as opposed to some other unknown firmware they were using.
- 32 bit motherboard compared to previous 8 bit board
- Direct drive Extruder instead of a Bowden setup
- Extra bracing
- Heated glass bed
- Auto bed levelling
To my surprise, this thing shipped in about 3 days. I’ve never had anything come that quick from China. Well, the first box came in 3 days. The second box followed a couple of days later. I wish I had pictures of this packaging, but as usual my excitement got the better of me and I didn’t get any pics.
I started building it straight away and put a good 10 hours into the assembly.

After assembly it dawned on me, that this thing isn’t going to fit through a regular door. The frame is just under 1m x 1m x 1m and wont fit through a regular doorway without some major disassembly. Fortunately I have an understanding wife and am in the process of building a garage. So in a month or so, I’ll shift it out of the lounge room and into the garage – or so I thought – 7 months later and I still don’t have a garage, but more about that in a seperate post.
OK, so the printer is now assembled and I’m good to go. Exciting times! I powered it on and browsed through the menus to get a feel for it. In the menus was an option for auto bed levelling. This would probably be a good place to start. So I hit the auto bed levelling button and watched it do its thing.
That thing was go crash the print head into the top left side of the frame, then make a horrible sound as the motor was pushing against the frame. Panic set in and I hit the power button to switch it off. On further inspection, I realised I hadn’t set up the X-axis end-stop correctly and so it wasn’t getting the signal to cut power to the motor. I fixed that and tried again.
Awesome, it stopped on the X-axis, but the Y-axis also had the same problem. I really should have checked it out at the same time. So when I hit the auto level button again, I had pretty much the same result – except this time the screen turned white and the power supply cycled. This can’t be good!

And it wasn’t good. After a couple of weeks of trouble shooting with Tronxy support (a challenging experience at the best of times) I pushed them for a replacement motherboard. It was clear that this thing was toast. They agreed and said they would send me a new screen as well as a new motherboard.
And so a month later I finally got the new motherboard – without the promised screen. I was keen to give it a go anyway. I hooked it all up and finally had a working printer.
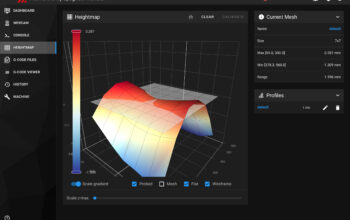
I was even able to perform the auto bed levelling.

OK, so it tan OK but there was 1.8mm variance right there. On the display it says it should be no more that 0.8mm. And so I went about making adjustments to the levelling screws – a painful process of trial and error over the next several hours. But no matter what I did 1.8mm was as good as it got.
But that was the least of my worries, because after a day or I started to get a new problem. Another white screen of doom. But this time it was intermittent. It seems the screen would work OK when the machine was cold but as it warmed up it would blank out. At first I would get a few hours, but over the next few days I could barely get a few minutes out of it. Back to Tronxy support to figure out what was going on.
They were surprised to hear I was sent a bare board. They were expecting I was going to be sent a complete display with wiring and board. Despite this, they got me to check cables and voltages to find the root cause. But then I had the motherboard crash in exactly the same way the first one did before we found a resolution. So once again I demanded a new board.
Another month of waiting and it finally arrived. Back to testing auto levelling and actually being able to make some prints. I started with some trinkets and toys for the kids as well as test / calibration prints. Some of the prints were great and some were garbage. It was clear I had a lot to learn.
More time spent with Tronxy support and they were surprised to hear that I was sent a bare board. This isn’t what they were supposed to send.