A few weeks ago while trying to sort out the idle on my 380SEC, I managed to break one of the vacuum check valves on my car. The check valve was actually already broken and patched previously by someone else. This of course led me to my local Mercedes-Benz car wrecker / workshop. I popped the bonnet to show him what I needed and the first thing he said to me was “your engine mounts are stuffed!”. Well, I couldn’t let that go and of course I bought 2 new engine mounts from him.
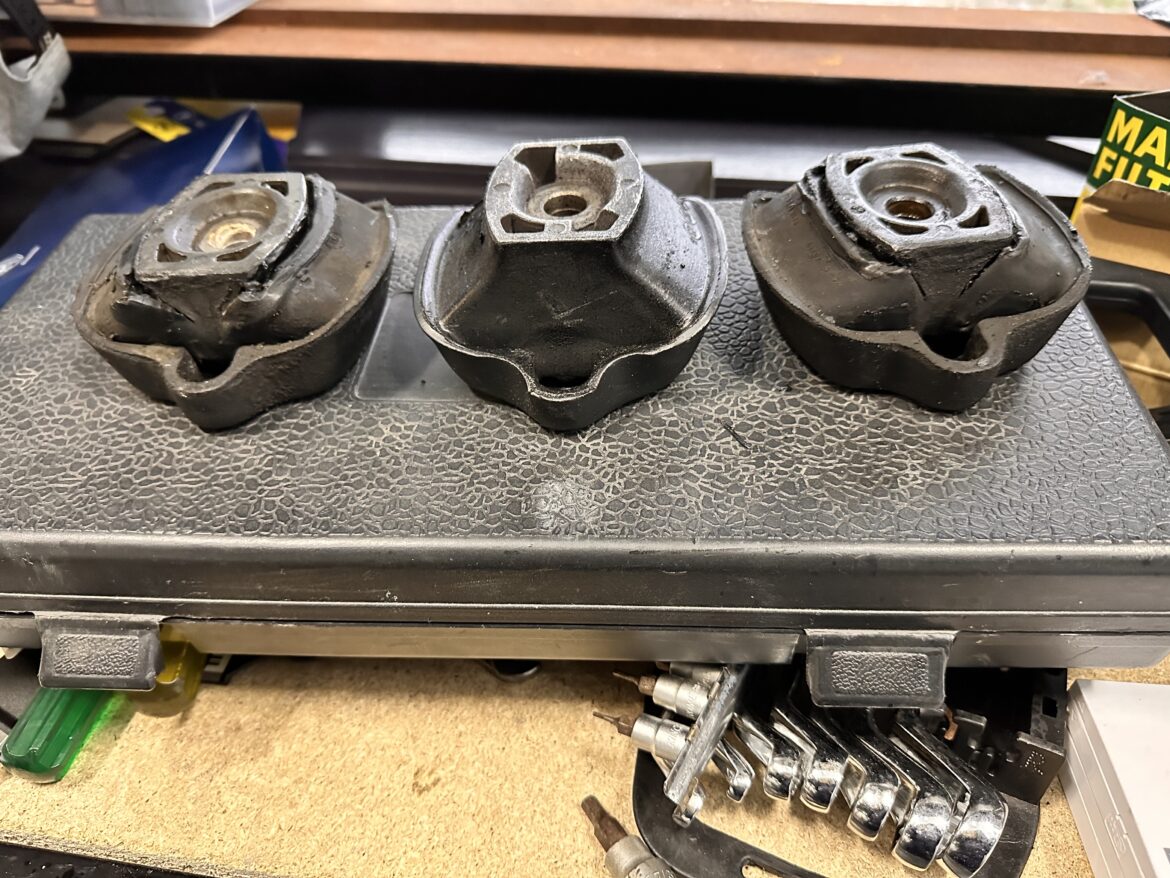
He wasn’t wrong! Check out the difference between the old and new mounts

I was in 2 minds about doing it myself, but I figured if I can’t do this, then I have no hope of engine swapping my 450SLC when I get it back from paint. And so I started on my journey with trepidation. Firstly checking if I could reach the bolts and secondly whether I could actually undo them as I had been forewarned that it’s easy to slip and round off the bolts, then it becomes another drama.
I pre planned this somewhat by getting all my tools ready as well as buying a couple more that I thought I might need. Here is what I ended up needing:
- 8mm hex key socket
- 6mm hex key socket
- Universal joint swivel socket adapter
- Socket wrench
- 600mm socket wrench with a flexible head
- 400mm socket wrench with a flexible head
- 300mm extension bar
- 4mm spanner
- 10mm spanner
- Podger bar / riggers wrench
- Some scraps of wood to support the oil pan under the jack
I’m fortunate to have a 4 post hoist in my garage, with a sliding secondary jack. It would have been possible to do this on chassis stands and a trolley jack, but just a bit more difficult. I certainly would not have attempted it without the hoist, but I know others who have. Then again, i also wouldn’t do an oil change without the hoist.
The first thing I needed to do was to remove the 8mm bolts attaching the engine mounts to the engine. To do this I needed my 8mm hex socket attached to my 300mm extension up through the cross member to the bolt. These bolts are very tight and I needed to use my 600mm ratchet to get the torque behind it to loosen it.

The next step was to undo the engine shock absorbers. My first instinct was to just undo the 10mm bolt at the bottom of the shock absorber. This of course didn’t work because the shaft of the shock absorber isn’t attached to anything. It wasn’t immediately obvious at first, but the shaft actually has a flat spot towards the bottom that can be held with a 4mm spanner. Once I did this undoing the nut was simple.

At this point, the engine can be lifted from and released from the engine mount, but the engine mount is still attached to the subframe. There are 2 bolts attaching the mounts to the subframe, one of these bolts is accessible from the engine bay, but the other can only be accessed from below when the engine is lifted.
From the top of the engine, on the wheel well side there is a 6mm hex bolt. On the drivers side, I was able to stack my extra long 6mm hex key socket, to my 300mm extension bar, to my swivel head ratchet to get the leverage I needed to undo the bolt. It’s quite a tight squeeze so having the swivelling head helped me to get the clearance I needed to be able to undo the bolt.
It was a similar story on the passenger side, however due to the positioning of the bolt and the air conditioning lines, I needed a universal joint to be attached to the hex key before the extension bar.

Back under the car and I could undo the other 2 bolts. To get to these bolts, I needed to lift the engine with my secondary jack. The service manual says to spread the load by placing a scrap of wood between the jack and the oil pan. I had a few scraps of laminate flooring left over from when I was installing the floors in my office. These have a rubber backing and we’re great for this task. I stacked 5 of them on top of my jack to give me the lift I needed (the jack doesn’t have a very high extension).
Once the engine was lifted I was able to fit my 6mm socket in the gap that opened up between the engine mount I was replacing and the bracket attached to the engine. I then needed my swivel head ratchet to get the clearance I needed. I can’t emphasise enough how important the swivel head was here. There’s just no way I could have undone those bolts without it. Driver and passenger side were pretty much the same for this.
With all the bolts out and the engine lifted, it was now easy to slide the engine mounts out and replace with the new ones, redoing the bolts in the reverse order from how they were removed. Ie, the top bolts first, followed by the shock absorbers and then the bottom bolts.
Except it wasn’t quite that simple when it came to installing the bottom bolts. The engine mount and the support bracket would not line up. This had me stuck for a while. I went online for some advice, but what I was advised didn’t work – undoing the top bolts to give some wiggle room to allow the holes to line up. The main reason this advice didn’t work is that with the bottom bolt attached and the engine lowered, there’s no way to tighten the top bolts as there is no clearance – even with the new engine mounts. Not to mention, it just didn’t give enough wiggle room.

The correct way to solve this, is to insert the podger bar up through the engine mount as far as it goes and then lowering the engine. This forces the engine forward slightly and makes the holes align properly.

So from the beginning, the correct way to reinstall the engine mounts is:
- Place the new engine mount in place
- Tighten the 2 top bolts from above \ below the car as necessary
- Insert the podger bar up through the cross member as far as it will go into the engine bracket
- Lower the engine ensuring the shock absorbers are correctly aligned to their mounting brackets
- Tighten the shock absorbers
- Install the 8mm bolts through the centre of the subframe, engine mount and bracket
All up this process took me a good 4-6 hours due to stopping and starting over a weekend, and the trouble I had aligning the 8mm bolts, but I think if I were to do it again, I’d have it done in under 2 hours.


