Sanding and Polishing For A Deep Glossy Finish
In part 1 of my rattle can restoration, I stripped my passenger door down to remove some unsightly body filler that was peeling away and repainted it with rattle cans. I go through the detail of that process here: Rattle Can Restoration Part 1/2.


Since I painted using acrylic paint out of a rattle can, it didn’t shine right away like it does when painting 2 pack out of a spray gun. This means I needed to do a lot of post paint sanding and polishing to get a deep gloss finish. I had this in the back of my mind when I was painting the door and made sure to apply plenty of clear coat to give it some meat to sand and polish back. I actually unloaded 2 complete cans of clear coat and applied 6 coat – remember I only painted 2/3 of the door because I didn’t touch the Sacco panels on the lower half of the door.
What this left me with was a really rough orange peel finish to the door. To cut it back I needed to let the paint cure for a couple of weeks and then I was able to start with the wet sanding.

I didn’t take pics of the process as I was trying to rush through as much as possible due to family commitments. I was also under a bit of time pressure to have this all completed by Sacco Day with the Mercedes-Benz Club of NSW. If you want to know more about Sacco Day, it has it’s own Instagram page here: Youngtimer Sacco Day (@youngtimer_sacco_day) • Instagram photos and videos
I started the process by wet sanding with 1200 grit paper and a small sanding block. This is where it takes a leap of faith because you need to sand through until the paint is smooth from the orange peel, but of course it’s going to look pretty bad with all the sanding marks you add with the 1200 grit paper.

As I was sanding with the 1200, I accidentally burnt through the colour coat, right down to the primer. I guess it wasn’t as thick there as I though it was. Since this is a temporary repair anyway, I wasn’t overly bothered by it.
After the 1200 I went through the same process again with 2000, 3000, 4000, 6000, 8000 & 12000 grit paper. In between each grade of paper, I would wipe the door down with a wet paper towel (a microfibre cloth would have been better) to clear the previous sanding residue from the door. If I didn’t do this, it would just get caught in the finer paper and defeat the purpose of fine sanding. These finer grits actually sanded a lot quicker than the 1200 as I already had a smooth surface and the goal was now to remove the fine sanding marks.
By the time I got to the 6000 grit paper it was starting to shine, but I pushed on to 12000 trying to get it really smooth. After 12000 grit, it still didn’t look quite right to my eye. The final step was to hand polish with a cutting compound. For this I used Meguiars Ultimate Compound as I had it on hand. I applied it with a damp microfibre cloth and removed it with a second dry microfibre cloth. I found it best to work in really small sections as it was difficult to remove otherwise.
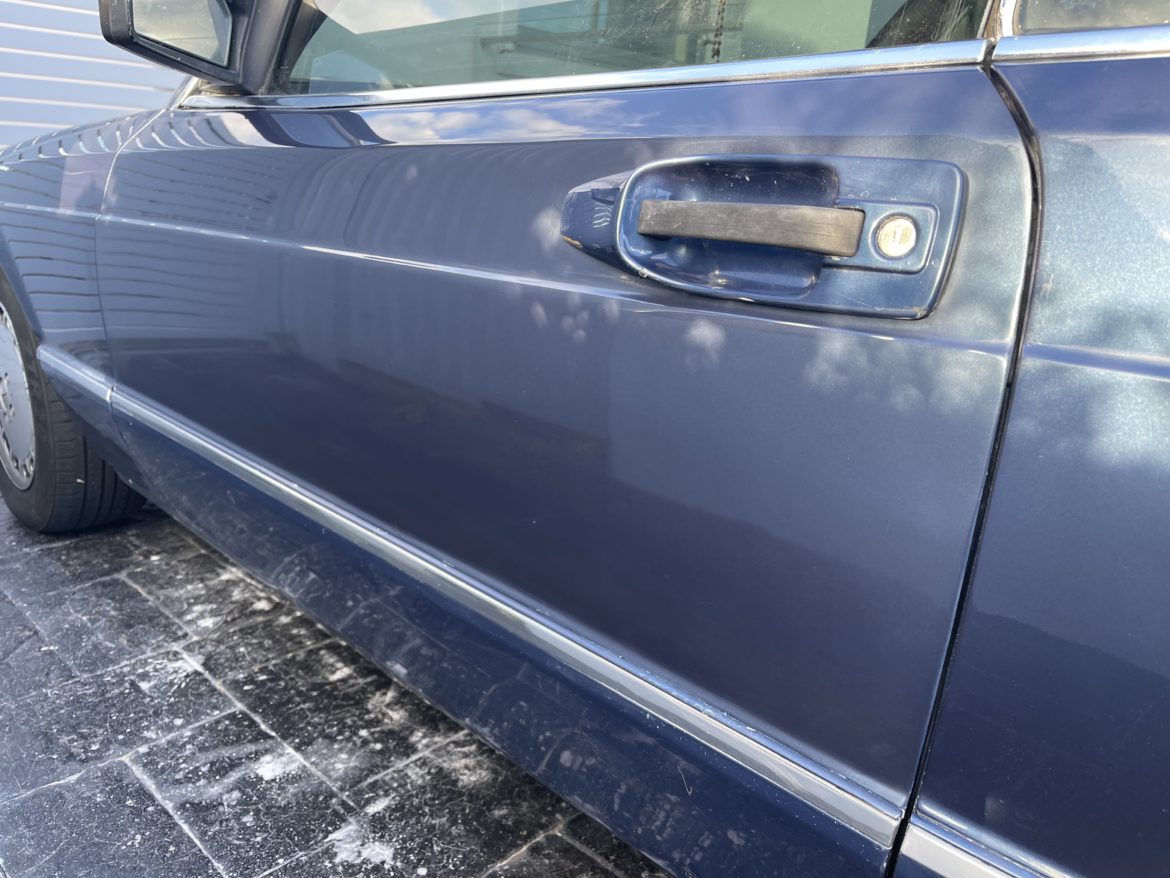
The finished door turned out way better than I had expected. There is some waviness in the finish as I didn’t smooth out the body filler as well as I could have, but as I’ve said this is a temporary repair until I get the new door fitted, so I’m not too bothered by it. At least I don’t have peeling paint, cracked filler and rusted metal in the finish.

As much as I hate to do it, here are some Amazon affiliate links for the products I used:
Meguiar’s G17216EU Ultimate Compound Colour & Clarity Restorer 450ml – They use a picture of a W107 on the bottle, so it must be good, right? 😜