Before heading off on The Concours Run 2023, I wasn’t really happy with how the 380SEC was running. It felt like it had a bit of a misfire at times and wouldn’t idle perfectly smoothly all the time. It was hardly bucking like a bull, but it was enough to leave me annoyed. I took it into my mechanic to have it checked out and he said he did a compression test and found it was a little low on compression on cylinder number 1.
During The Concours Run I had other drivers in the group note that it would some times let out a puff of blue smoke as I let off the accelerator after a bit of an acceleration run – a sure sign that valve seals are worn. I decided I would try and tackle the job on my own, mainly because my mechanic really didn’t want to do it and anyone that did would likely charge over $2,000 for the job.
I started by gathering parts and tools
A big job like this always starts with an online search to see what’s involved. From my online searches I put together a list of must-have tools and parts. Truth be told, my search didn’t come back with a definitive list like this. I had to rush out and by tools a couple of times mid-job. Often this meant waiting a day or 2 until I had the chance to by the tools then find the time to do the work.


From left to right we have:
- 27mm socket
- 125mm socket extension bar
- 600mm breaker bar
- 19, 17, 10mm spanners
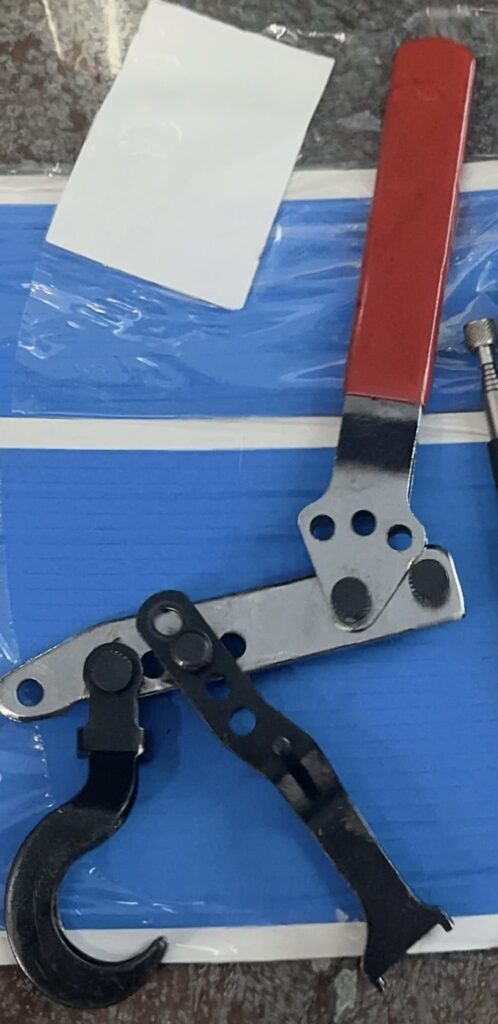
- OHC Valve Spring Compressor Tool (generic)
- Magnetic Pickup Tool
- Spark plug socket
- A couple of extension bars and a uni-joint (not in pic)
- 3/8 Ratchet
- Assorted Picks
- Bent Nosed Pliers
- Magnetic parts tray (not in pic)
- Air compressor capable of supplying 100psi of air (not in pic)
- Cylinder leak down tester (in the red case)
Additionally, I also purchased the parts I needed:
- 16 Valve seals
- 2 Rocker cover gaskets
- 8 copper crush washers for the rocker cover bolts
- 8 Spark plugs
- 2 sets of camshaft oiler repair kits
The spark plugs were replace when I returned from The Concours Run and would have had no more than 500km on them, so I made the decision to reuse them. They can get fouled up pretty quickly with a valve seal leak, but my leak was relatively mild and the old plugs didn’t seem to be too fouled up.
Diving in head first
I knew this was a big job, so I took my time with it and decided to work methodically. I started by removing the air filter followed by spark plugs and leads. I numbered the spark plugs as I pulled them out as I had intended on reusing them. I also numbered the leads to make the job easier when putting them back in.
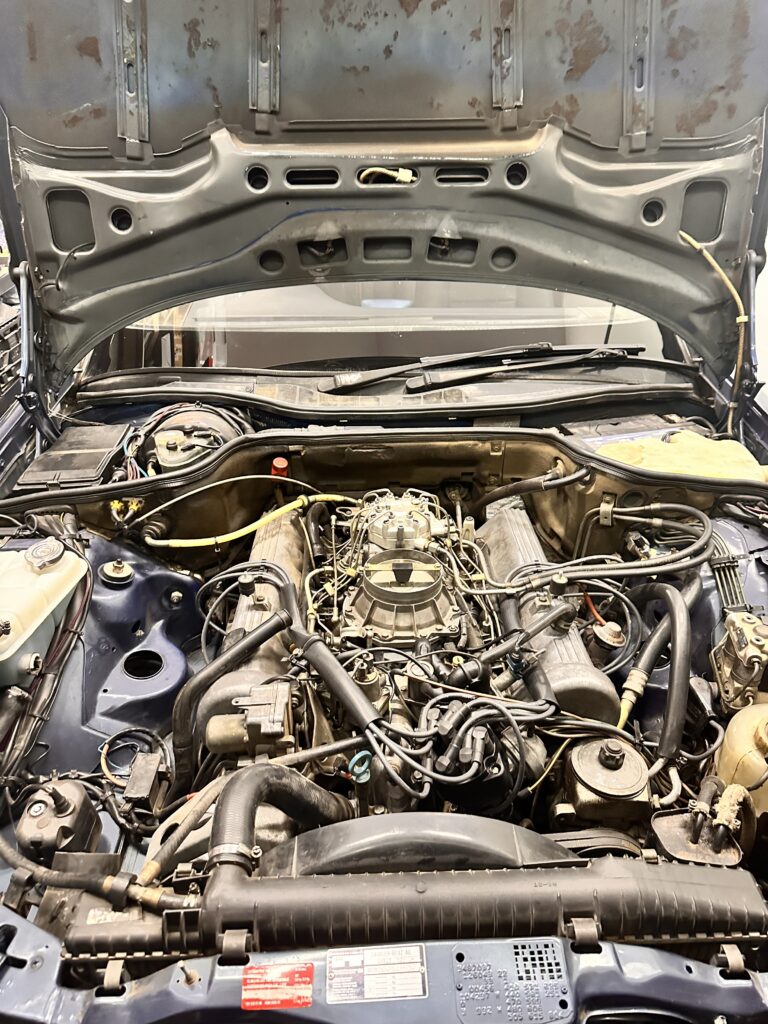
With the plugs and leads out of the way it was time to remove the rocker covers. Each rocker cover is attached with 4 x 10mm bolts with copper crush washers. It’s a good idea to replace these washers if the rocker covers ever come off. I started with the drivers side and quickly found I wouldn’t be able to remove the rocker cover without first disconnecting the vacuum line going into the brake booster. I disconnected this on the side closer to the engine as I don’t like messing with anything relating to brakes. There was also a vacuum line in the way that I promptly moved aside.
With the bolts out and the vacuum lines cleared it still took a little bit of finagling to get the rocker cover off. It seemed to be getting caught on the accelerator linkages near the firewall but it wasn’t particularly difficult to remove.
I now had to remove the first rocker arm from the head. To do this the cam node needs to be pointing upwards meaning that the piston is a bottom top dead centre (BTDC). This allows for the valve and spring to compress with the tool so that the rocker arm could be slid out from underneath the cam. To rotate the cams, the crankshaft needs to be manually rotated. This is achieved by placing a 27mm socket over the bolt in the middle of the crankshaft and then attaching this to a 125mm extension bar attached to a 600mm breaker bar. The entire thing can then be rotated clockwise … but before I could do that, I needed to remove the fan – 4x 10mm bolts and it was loose. Actually it was a bit more difficult than that because one of the bolts was positioned on the bottom and not easily accessible. Then I could just pull out the fan right?? No! The fan shroud was in the way. I removed the clips holding the shroud in place which allowed me to wiggle the fan out. Then I could rotate the crankshaft. Except I didn’t have a 27mm socket so day 1 ended on that. I knew what to do, but didn’t have the tools.
The next day i went out and bought the 27mm socket and several of the other tools mentioned earlier. I managed to rotate the engine in a clockwise direction easily enough and pulled out my Valve Spring Compressor. I spent at least 2 hours trying to set up the Valve Spring Compressor tool correctly but couldn’t quite get it right. Eventually through shear grit and determination I managed to compress the spring and get the rocker arm out. I walked out of the garage covered in sweat and decided the tool is not right for the job and tried to find another online.
Unfortunately the genuine Mercedes-Benz tool is no longer available and the companies that sell the reproduction tools either have no stock or charge extortionate prices. I reached out to friends online and no one was able to help there either. I remember my mechanic once mentioned to me that he has the tool hidden away somewhere so in desperation I walked over to his workshop (conveniently 300m from home) and asked if I could borrow it. He had a quick Look and handed it over to me .. unfortunately it was a generic OHV spring compressor and would not work for me. So I was back to square 1.
In the meantime someone online said they had the tool and were happy to lend it to me – even better they were just over in the next suburb. We arranged for a time and met up – but unfortunately, this too was the wrong tool. The tool he had required the head to be removed from the vehicle.

So I persisted with the tool I had and looked at how others have set the tool up. While no one specifically mentioned how the setup was done, I did pay close attention to how Kent Bergsma from MercedesSource.com ships the generic tool he sells. I set mine up the same way and had a go. Unfortunately it was still very difficult. But more about that later.
Before I could remove the valve spring I needed to get the piston up to Top Dead Centre (TDC) on the compression stroke. It wasn’t immediately obvious to me that it needs to be on the compression stroke so again I spent several hours trying to understand why I couldn’t get the compression up. I plugged my compression leak down tester into the cylinder I was working on, got the air compressor up to 100psi and slowly opened the valve on my leakdown tester to fill the cylinder with compressed air only to find that it wouldn’t compress at all. My compressor was running flat out trying to pressurise the cylinder without success. Eventually I did figure out that I was not on the compression stroke and was able to pressurise the cylinder successfully. It’s worth noting that even though the cylinder is pressurised it is not completely air tight and a hissing sound is emanating from the head. This didn’t cause me any issues and my compressor was able to keep up maintaining 90-95psi.
In case you’re wondering, the reason the cylinder needs to be pressurised is once the valve spring is removed there is nothing holding onto the valve. This means that the valve can theoretically fall down into the cylinder and the only way to get it out is by removing the head. This had me really worried when I started the job, but the reality is that there is very little risk of this if the piston is at TDC. With the piston at TDC there’s only about 5-10mm of movement in the valve before it hits the piston. In fact there was one time where I forgot to connect the air line of my leak down tester to the cylinder (there’s a quick connector in the middle that I had disconnected when rotating the crankshaft) and it only dropped by 5-10mm. Not having the cylinder fully pressurised did make the job significantly more difficult due to having to compress the spring further during reassembly which gave the biceps (well one of them) a bit of a workout.
With the cylinder now pressurising to 90-100psi I was ready to remove the valve spring. I again used my spring compressor tool to compress the spring but it wasn’t co-operating. The issue was that the claw that presses down on the spring would spread apart and not push the spring down. I got around this using a cable tie to limit how far apart it can spread and finally had some success. With the spring down I was able to use my magnetic pick up tool to remove the collets from the valve that locks the spring in place. Except I somehow managed to lose one. I have no idea where it went, but it wasn’t in the head. I continued on anyway removing the spring retainer, and the 2 valve springs so that I could access the seal.
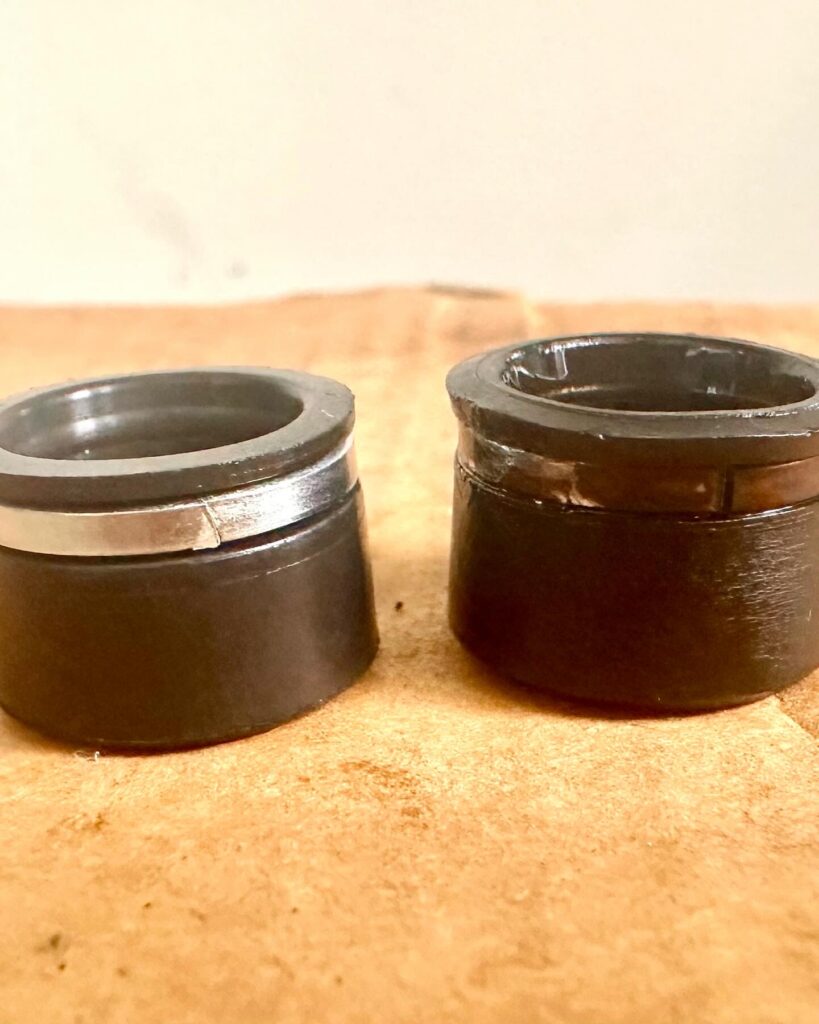
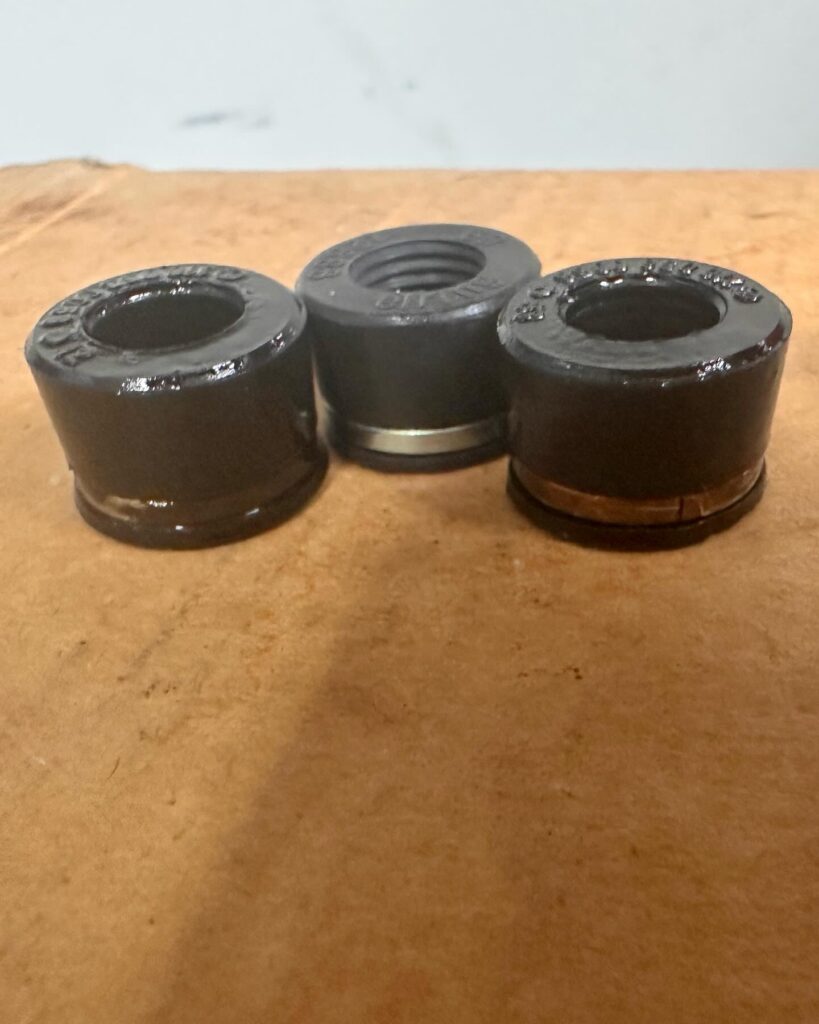
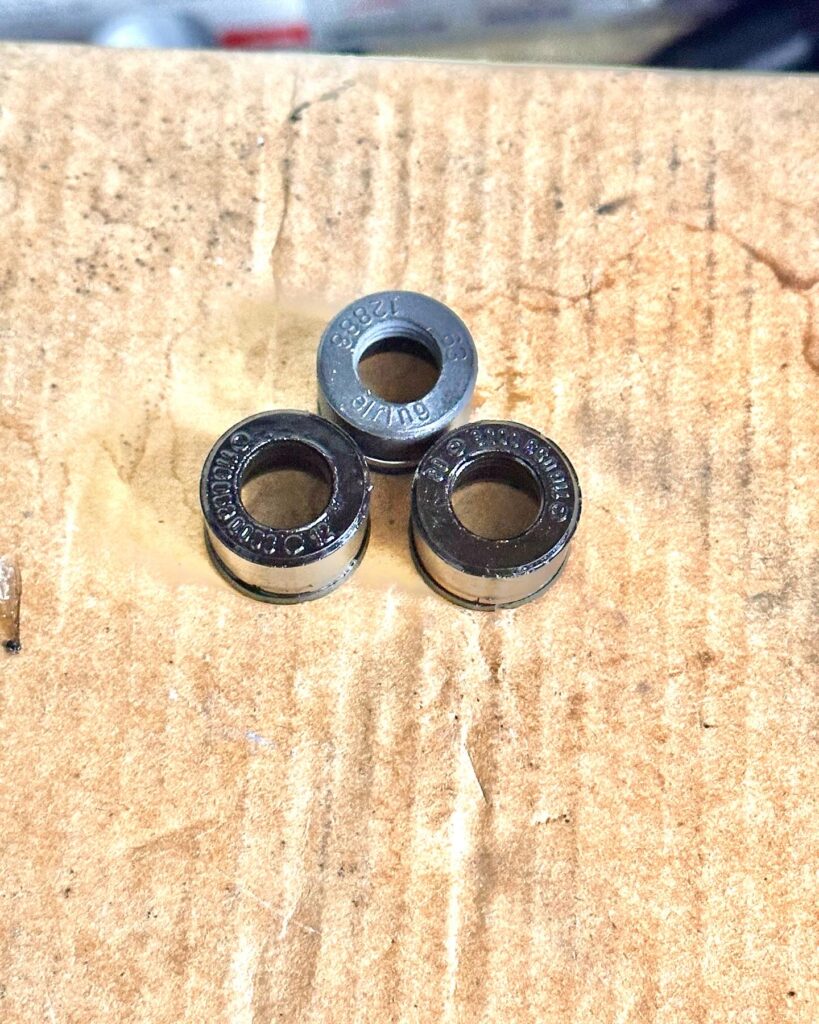
With the spring out of the way I could finally access the valve seal. I reached in with a pair of bent nosed pliers and was able to pry it off with a little effort. I then took a new one out of the pack and simply slid it down the valve stem to replace it. This process took about 1 minute and made me feel that I must have missed something since it was so easy.
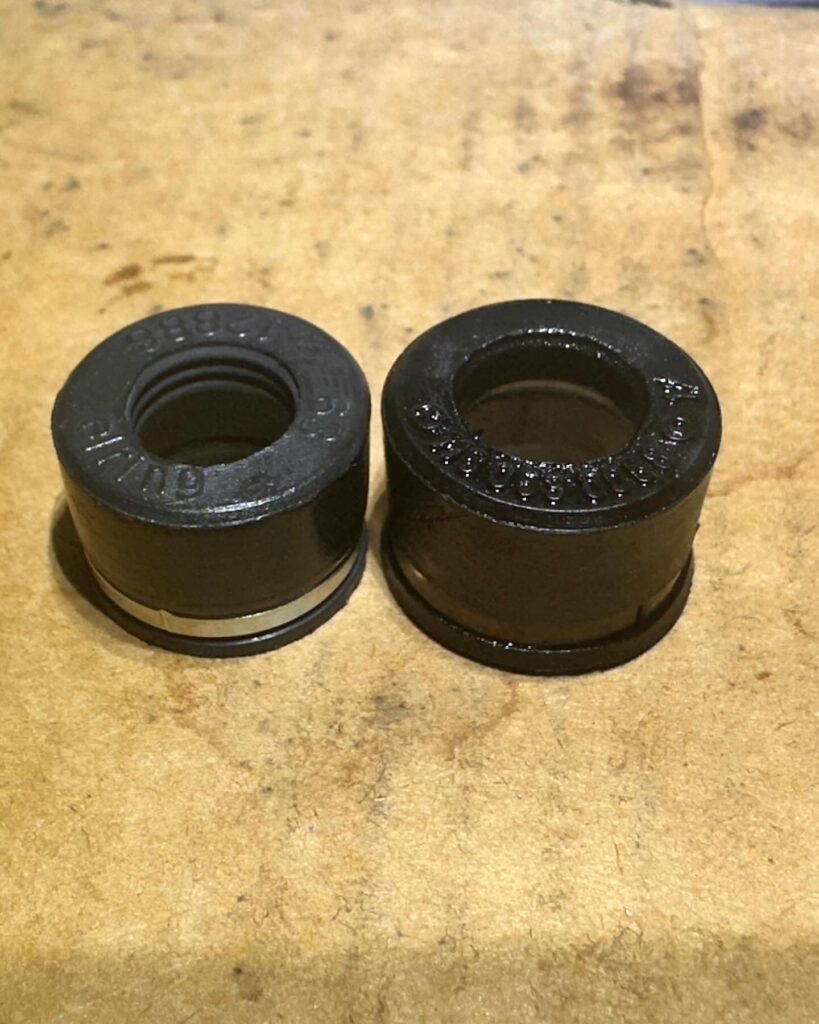
At this point if had my first opportunity to have a look at the seals I removed and compare to a new on. To my untrained eyes they didn’t look terrible. They weren’t cracked and they were still slightly pliable, but on closer inspection I could see that they had warped slightly on the bottom lip and the opening on the top was quite a bit larger. These 2 faults were likely what was causing my problem.
It was too easy, but it was too soon to be celebrating. I still needed to put it back together and I had 15 more seals to do. I put everything back in the same order I pulled it out being sure that the springs were also the right way round (painted markers down). I then spent at least another 2 hours trying to get the 1 collet I had left back in. It was late at night and I really didn’t want to leave the compressor running all night to leave the valve up. Remember at this point I didn’t know that it would be relatively safe. The next day I went out to visit John at MB Classic Star who kindly gave me some replacement collets free of charge. He said he was just happy to help!
Due to work and family commitments I had to leave the car for a few days before I could try again. I managed to get the second collet in, in around 5 minutes but I still felt the tool was no set up right. It was at this point I realised that I’m doing this in hard mode and the camshaft oilers need to be removed. Of course they didn’t come off without snapping the plastic retainers so I had to order a new set of those while I continued the job.
With the camshaft oiler out of the way I repeated the process on the next valve. With all the right tools the job went considerably faster and I was able to go from start to finish in around 1 hour.
When it came to replacing the collets I found that if I could place them in roughly the right position using my magnetic pick up tool, I could then compress the spring and use my finger to guide the collets into their groove in the valve stem as I uncompress the spring. I suggest wearing gloves when doing this as I was. It sounds messy but was actually very simple.
I went through the same process over several nights when time was available. Never completing more than 1 piston at a time and always trying to adjust the spring compressor tool to make it work better. It wasn’t until I reached piston number 5 on the other side of the car that I finally found the perfect setup with my tool. This was born out of necessity because the setup I used on the drivers side didn’t give me enough leverage when I was working on the passenger side.
So what does the correct setup look like??? The correct setup of the tool has the handle only connected on the centre bolt and resting on the secondary bolt (rather than using the secondary bolt through as handle which is how it is shipped). The cam claw is not attached to the end of the tool but 1 hole inwards with the spring compressing claw two holes over and on the second setting. Additionally the screw on the side of the claw is tightened as far as possible. This negates the need for a cable tie to prevent the spring compressor claw spreading although it does not totally eliminate it.
Here’s a video showing how well it’s running after the new valve seals were fitted.
Summary of steps required
- Disconnect the battery
- Remove spark plugs
- Remove fan shroud retaining clips
- Remove fan
- Remove rocker covers and any vacuum lines that cross over the rocker covers
- Remove the camshaft oiler by prying it off with a screwdriver (the plastic bits will break and need to be replaced)
- Rotate the crankshaft using a 27mm socket on a 125mm extension bar connected to a 600mm breaker bar until the camshaft node is pointing upwards
- Use the Valve Spring Compressor tool to compress the valve spring and free up the rocker arm. Pull it out from under the camshaft
- Remove the shim between the rocker arm and the valve spring using a magnetic pick up tool
- Rotate the crankshaft until the piston is at TDC on the compression stroke
- Screw the compression leak down tester into the spark plug hole
- Pressurise the cylinder to 90-100psi
- Use the Valve Spring Compressor tool to compress the valve spring and allow the collets to be removed. It may be necessary to use a pick to free up the collets after the spring is compressed
- Use a magnetic pick up tool to remove the collets
- Lift of the retaining ring and valve springs noting the direction of the springs
- Remove the old valve seal using a pair of bent nosed pliers being careful not to score the valve
- Insert the new valve seal being careful not to damage it as it slides down the valve
- Replace the spring and retaining ring ensuring the spring is positioned the same way up as it was prior to removal
- Use the valve spring compressor tool to compress the spring and insert the collets using the magnetic pick up tool and / or any other tool that works
- Place the shim over the retaining ring
- Compress the spring with the retaining ring and re-insert the rocker arm noting that the shim and rocker arm must go on the same valve that they were removed from
- Repeat steps 7-21 for each valve seal
- Rotate the engine manually for 1 or 2 full revolutions to ensure everything is turning smoothly
- Re-attach rocker covers
- Re-attach vacuum lines
- Re-attach fan and shroud
- Re-connect battery