A few weeks back I was on a lovely drive with the Mercedes Benz Club in my 380SEC. Everything was going well until I came to open the window to say hello to a friend. The window came down about an inch, then just wouldn’t budge. It seemed to be jammed something. This really surprised me because the windows have always been working perfectly. I’ve never had an issue with them prior to this. After a bit of fiddling with the switch and a firm grip on the glass, I managed to get it up again – albeit with some horrible sounds of metal clanging on metal. I continued on with the drive and parked the car in the garage for a week or so before I opened it up for a look.
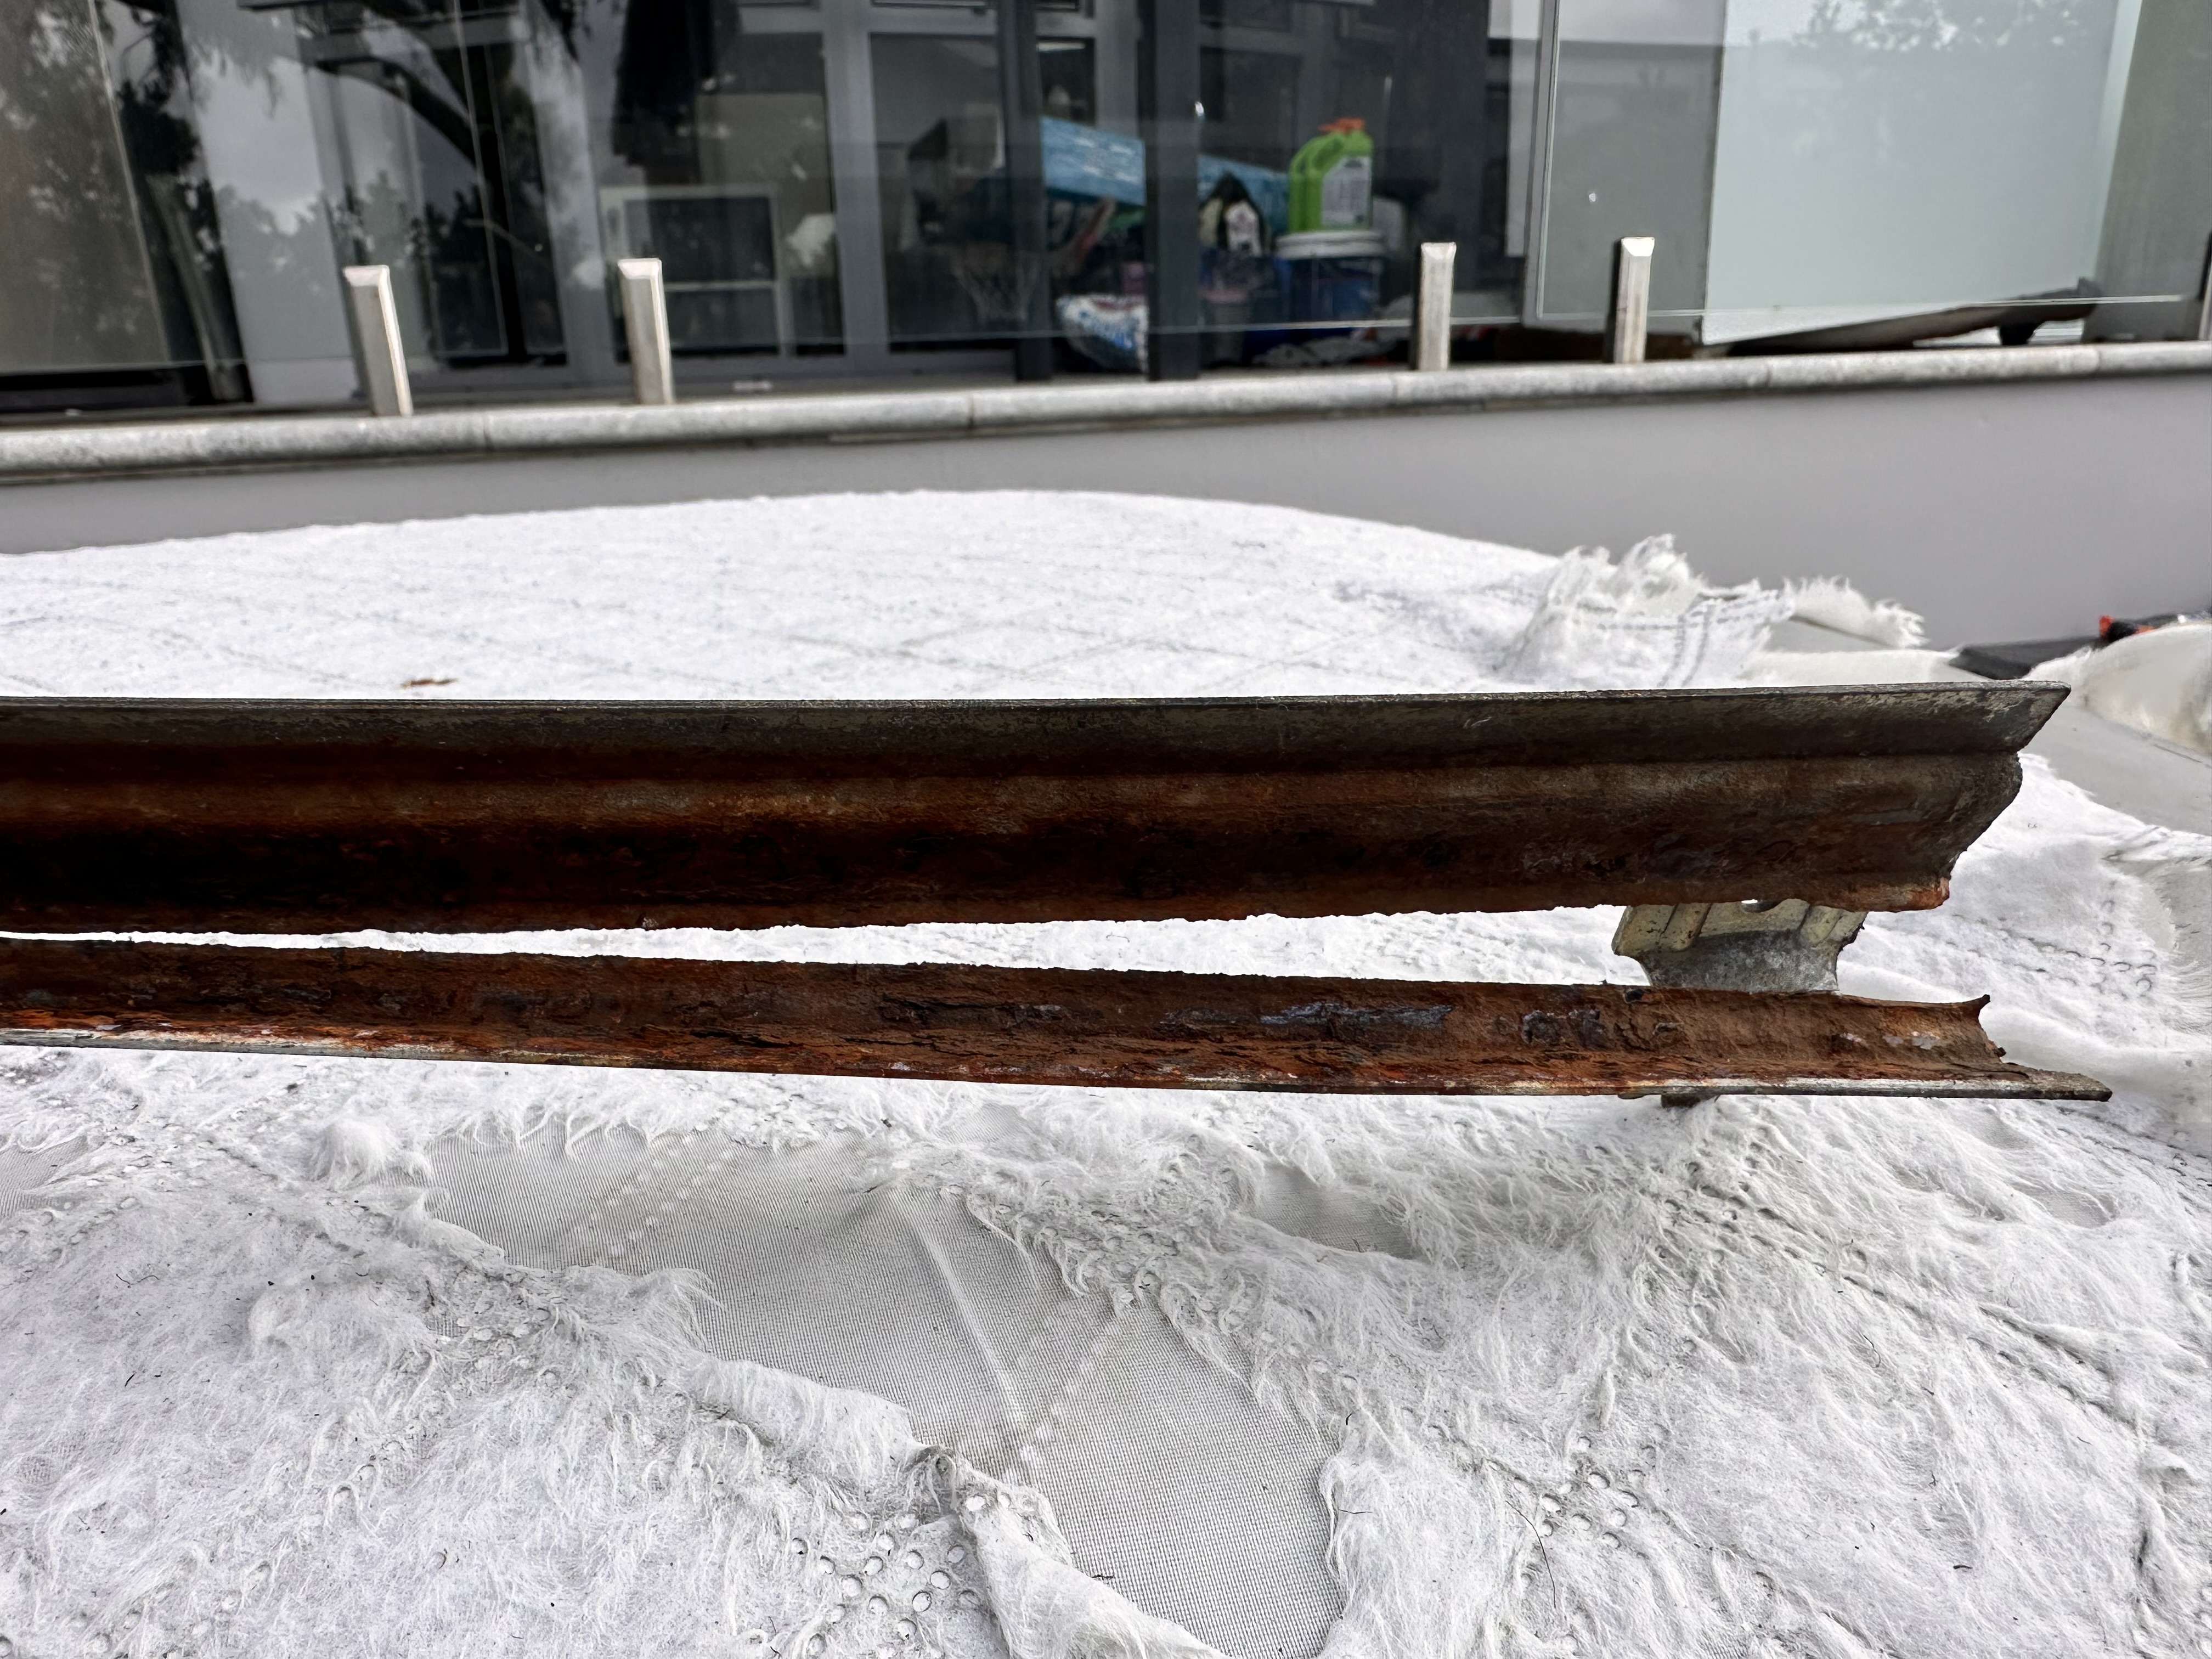
What I found was not pleasant. I had figured it was going to be 1 of 2 things. Either a broken nylon clip of some sort or a broken regulator. It turned out to be neither of these. What had happened was the rail that attaches the glass to the regulator had rusted out and the rubber that sits in this rail and holds on to the glass had hardened up. So when the regulator moved all the way to the top, the rail could no longer handle the force and would bend and split open. When it went back down the split portion would rub against the regulator and jam or bend even worse. The regulator itself actually looked pretty good.

The fix
When I took the part out it looked pretty bad. One of the 3 brackets welded to the rail had come off, it had split down the middle due to the rust and bent wildly out of shape.
I had heard anecdotally that people have been able to weld these back together and put back into service. Its been a couple of years since I took the welder out and I wasn’t particularly good at it, but thought I’d give it a go anyway.


My atrocious welding skills aside, I managed to get it back in one piece. I decided not to bother with the middle bracket that fell off and made do with the 2 that survived. I then gave it a thick coat of KBS Rust Seal. This stuff gets brushed onto the steel then leaves a waterproof coating that prevents rust from forming.


I was feeling optimistic at this point, and installed it all back into the car. Unfortunately it wasn’t good enough. The rubber was so dry that it didn’t grip the window properly and even after I welded the rail it still had a lot of flex. So it was jamming up just as it did before.
I’ll just order a replacement
I figured the rail was too far gone at this point and went looking for a replacement. None of the local wreckers had the part, so I went online looking for the part number from the EPC. Unfortunately, I couldn’t find a number. It turns out that this part was only available with the actual window as a complete unit.
Could I McGuyver something with parts from another model?
I went online and did a generic search for “window lifter rail”. A few options came up with a rail from a Land Cruiser half heartedly topping my list.

I wasn’t totally committed to this, but it was kind of similar and in the worst case I figured I could just weld new brackets on. I was about to order, but thought I’d have one last search to see if I can find something better.


For $22, I could get an entire section of window rail, and a matching seal for just $7 more. A total of $29 was worth the risk. I figured the C126 Mercedes glass doesn’t have any particularly special characteristics that would prevent this from fitting, and the rubber seal would ensure a snug fit. Here is the URL for those parts:
The only issue would be creating some brackets to suit. I went to Bunnings to find some sort of material I could fabricate into a bracket. Most of the steel I found there was either too thin and wouldn’t have the strength I need or way too thick and would be too bulky to work. I eventually found and settled on some 40 x 25 x1.6mm 1m Aluminium Unequal Angle Bar. This would be simple to cut, but of course, you can’t weld aluminium to mild steel. So I had to find a way of joining them. I came across Sika 252 High Strength Structural Sealant. It sounded about right so I gave it a go.


I cut up some brackets, glued them in place and went to dry fit them in the car. My brackets weren’t in quite the right place and when I tried to attach it to the regulator, they just snapped off. I initially blamed this on not letting the glue dry long enough, so I tried again, but even after a 24 hour cure, the brackets still came off too easily. $45 wasted!
I had to try something else. I did some research online and was ready to try JB Weld Cold Weld Epoxy. This probably would have been the best adhesive for this, but unfortunately I couldn’t find it locally. I wanted an end to this project and needed something off the shelf. I didn’t want to wait a day or 2. So I went to Bunnings and had a look at my options.
I recalled from previous diy jobs that I had good success in getting aluminium to stick to timber using Sika Tech Grip. It was relatively inexpensive at only $15 for a small bottle, so I thought I’d give it a go. To my relief it gave me some really good results on a test piece, so I went about setting it up on the real bracket.
I was heading off the following day for a long weekend away with the family, so I worked fast to get the brackets positioned and glued into place. The glue was quite runny, so I used some masking tape to stop it dripping and to hold the aluminium in place until it cured – about 24 hours. Since I was going away it was going to get a long 72 hour cure.


I got back from my weekend away and went straight to the garage. The brackets were firmly in place and I was ready to fit the rail … except in my rush to get it done, I had the rails on back to front. So it didn’t fit. FML!
Now I had a new challenge — how was I going to get them off?
Having worked with the product before I knew that acetone was going to dissolve the glue, so I gave it a good soak and took the brackets off. I quickly cleaned everything up and glued them back in.
Finally, I was able to put the bracket onto the regulator without any fit issues. Now I needed to attach the rubber to the glass and into the new rail. I was hoping that a friction fit was going to be enough, but unfortunately it didn’t hold. When I tried to wind the window down the window came apart from the rail and the rubber seal. I had to glue the glass to the rubber and the rubber to the rail. I used the same Sika Tech Grip adhesive for this, let it cure overnight and went to check on it the next day.
Finally, success! The window was going up and down smoothly. I took the opportunity to grease up the sliders and regulator mechanism at the same time. It should make for a smoother range of motion.
Update 31/03/2024
The tech grip adhesive finally failed on me and my window stopped working again. This time around I used JB weld epoxy. I’ve done some bench testing by gluing 2 pieces together and hitting it with a hammer. It didn’t appear to hold any better than the tech grip in this test, but interestingly where the tech grip’s bond to the metal seemed to fail, the JB Weld maintained its grip to the metal, but the adhesive itself split.

I fully expect this to fail in a few weeks/months and when it does, I think I will remake the brackets from steel and pull out the welder. I’ll probably need to start from scratch as I have glued the rubber seal glass and the rail together and only acetone will seperate the rail from the rubber and glass which will destroy the rubber seal.